
Showing posts with label DIY. Show all posts
Showing posts with label DIY. Show all posts
Friday, September 5, 2014

Tuesday, July 16, 2013
Poor People Food: Spaghetti Edition
With the upcoming move and one income, I've been looking for any opportunities to save money on my grocery bill.
Tonight I wanted to share with you one easy, cheap meal you can make when you're in a hurry, but can't afford to go out.
I think I need to preface this by saying that J has hated spaghetti for a long time. Since we got married, I've found several creative ways to make it that he enjoys (adding ground beef, fresh squash, or cheese), but they all involve adding expense to the meal.
Recently I discovered that the flavor in the pre-made sauce is what really turns him away. By making my own sauce, I was able to cut the cost of an already affordable meal and please us both! This is starting to sound like a 1950's advertisement. Yikes!
First, I put the spaghetti on to boil with a tiny splash of olive oil and a pinch of salt.
Then I take a can of tomato sauce that costs less than a dollar and pour into a sauce pan over medium high heat. I add a generous dash of olive oil (probably around 1/8 cup), Italian seasoning, garlic salt and onion powder. I heat it until it starts to pop, stirring regularly. Then I turn it to medium low and stir it more often to keep it from exploding all over the stove, until the noodles are ready.
Tada! Dinner's ready! With one box of off-brand spaghetti and 4 cans of tomato sauce I can make four big meals for around $6. Bam, Martha Stewart! Take that! ;)
When I'm feeling extra adventurous, I mix the sauce and noodles in an oven safe dish and sprinkle white cheese on top. I heat it in the oven at about 200 degrees until the cheese is melted. Mmmmmm
Tonight I wanted to share with you one easy, cheap meal you can make when you're in a hurry, but can't afford to go out.
 |
| That's all you need! |
Recently I discovered that the flavor in the pre-made sauce is what really turns him away. By making my own sauce, I was able to cut the cost of an already affordable meal and please us both! This is starting to sound like a 1950's advertisement. Yikes!
First, I put the spaghetti on to boil with a tiny splash of olive oil and a pinch of salt.
 |
| For whatever reason I decided to whisk the sauce in a bowl. This is unnecessary. |
Tada! Dinner's ready! With one box of off-brand spaghetti and 4 cans of tomato sauce I can make four big meals for around $6. Bam, Martha Stewart! Take that! ;)
When I'm feeling extra adventurous, I mix the sauce and noodles in an oven safe dish and sprinkle white cheese on top. I heat it in the oven at about 200 degrees until the cheese is melted. Mmmmmm
 |
| Extra adventurous! |
Sunday, June 16, 2013
Cupcake Wars!
A couple of months ago J and I were hungry...Wait...we're always hungry....
And we also wanted to go on a date...
Seems simple enough--go get some food.
Unfortunately, we're also poor...
So we decided to have cupcake wars in our kitchen using things we had on hand.
I use the phrase "cupcake wars" loosely because it turned out to be J taking photos of me making cupcakes more than a competition.
We picked two cupcake recipes, Red Velvet and Lemon, out of a lifestyle magazine I get. Click here to read another recipe I adapted from the magazine.
I'm not going to post the recipes here because they're pretty basic...just look on pinterest, it's been covered. The idea is, take your man to the kitchen and cook together!
Or as in our case, your husband will play with his new camera while you do most of the baking...still fun!
Here some of J's photos. I picked ones that highlight some cupcake simple baking tricks to make the cupcakes come out a little more delicious.
And we also wanted to go on a date...
Seems simple enough--go get some food.
Unfortunately, we're also poor...
So we decided to have cupcake wars in our kitchen using things we had on hand.
I use the phrase "cupcake wars" loosely because it turned out to be J taking photos of me making cupcakes more than a competition.
We picked two cupcake recipes, Red Velvet and Lemon, out of a lifestyle magazine I get. Click here to read another recipe I adapted from the magazine.
I'm not going to post the recipes here because they're pretty basic...just look on pinterest, it's been covered. The idea is, take your man to the kitchen and cook together!
Or as in our case, your husband will play with his new camera while you do most of the baking...still fun!
Here some of J's photos. I picked ones that highlight some cupcake simple baking tricks to make the cupcakes come out a little more delicious.
 |
| Invest in a stand mixer. It's not absolutely necessary but it just makes everything easier and more fun. |
 |
| There are a lot of ways to separate eggs. This is my technique. It's old fashioned but it gets the job done. (Using the whites without the yolk makes the cake whiter, fluffier and less fattening. ...I just added that last attribute because it sounds good. If you care about fat, you probably just shouldn't eat cupcakes.) |
 |
| I squeeze a lemon just like anyone else, I just liked this photo. |
 |
| I pipe icing out of a gallon baggie with the corner cut off. To fill the baggie I put it in a glass then pour or scoop the icing in. |
Wednesday, June 12, 2013
Craftiness!
Hey y'all!
Yesterday I was in a crafty mood while waiting on edits from my thesis adviser. I saw this craft on Pinterest the other day. It said something about the doorbell being broken, but since we don't have one in our duplex, I thought it could be just as fitting.
I just drew the letters in pencil and painted it with acrylic paint. I mixed the colors myself to give it some depth.

Yesterday I was in a crafty mood while waiting on edits from my thesis adviser. I saw this craft on Pinterest the other day. It said something about the doorbell being broken, but since we don't have one in our duplex, I thought it could be just as fitting.
I just drew the letters in pencil and painted it with acrylic paint. I mixed the colors myself to give it some depth.

Can you tell I'm tired of writing? Long thesis=short blog. ;)
Have a great week, y'all!
Monday, October 15, 2012
Incidentally-Vegan Brownie Experiment
Tonight I got the sudden urge to bake. It hit me like a ton of bricks and I know exactly why--we have no milk or eggs in our house.
I also have no car temporarily which means no quick trips to the grocery store for me. Growing up a country girl, I have learned to adapt.
Someday I'll tell my grandkids about how when I was their age there was no such thing as a quick trip to the grocery store in my best old-redneck-lady voice.
"Well you see here dearie! First we had to go find a tractor that wasn't plowing something up. Then we had to go on and hitch it up to a covered wagon using our best old mare. It was 200 miles to the nearest general store, so that'd take about a day. It was always snowing too back then."
I think I've gotten off track.
Anyway, so I went back the basics like any good country girl would do. I started Googling for no milk, no egg recipes.
That didn't work.
They all called for vinegar. I don't stock vinegar for some reason. Maybe I should start.
Then I searched for vegan recipes realizing that I was going to omit animal products. (I'm giving myself way too much credit here.)
I stumbled upon a Pinterest board full of vegan dessert recipes. Yay for Pinterest!
But they all called for vinegar too. :/
Except for one, a brownie recipe from this blog.
It calls for a lot of a few simple ingredients I keep on hand. Luckily I had plenty of all of it.
I did get a little concerned when I read 1 cup of vegetable oil. Say what?! That's a lot of oil!
Oh well, Paula Deen's still kickin', and I've got a skinny husband. So why not?
Then I caught myself wondering if I should spray the pan before I put the batter in it.
Then I thought, 'Does this really need more grease?'
Ummm, no.
Finally (because I'm so daring and darling of course ;) ) I decided to experiment further and wrote J's name in caramel syrup on the batter before I threw it in the oven. This may be a culinary mistake...I'll blame it on love.
So around 30 minutes in the oven they were done!!!
When your inner child is a little too much like honey boo boo, waiting for brownies to cool seems ridiculous. So I would normally dig right in. But tonight I decided to practice restraint and wait for J to get home. So I'm going to leave you in suspense until tomorrow about how they taste.
I also have no car temporarily which means no quick trips to the grocery store for me. Growing up a country girl, I have learned to adapt.
Someday I'll tell my grandkids about how when I was their age there was no such thing as a quick trip to the grocery store in my best old-redneck-lady voice.
"Well you see here dearie! First we had to go find a tractor that wasn't plowing something up. Then we had to go on and hitch it up to a covered wagon using our best old mare. It was 200 miles to the nearest general store, so that'd take about a day. It was always snowing too back then."
I think I've gotten off track.
Anyway, so I went back the basics like any good country girl would do. I started Googling for no milk, no egg recipes.
That didn't work.
They all called for vinegar. I don't stock vinegar for some reason. Maybe I should start.
Then I searched for vegan recipes realizing that I was going to omit animal products. (I'm giving myself way too much credit here.)
I stumbled upon a Pinterest board full of vegan dessert recipes. Yay for Pinterest!
But they all called for vinegar too. :/
Except for one, a brownie recipe from this blog.
It calls for a lot of a few simple ingredients I keep on hand. Luckily I had plenty of all of it.
I did get a little concerned when I read 1 cup of vegetable oil. Say what?! That's a lot of oil!
Oh well, Paula Deen's still kickin', and I've got a skinny husband. So why not?
Then I caught myself wondering if I should spray the pan before I put the batter in it.
Then I thought, 'Does this really need more grease?'
Ummm, no.
 |
| Sadly, I have really bad handwriting in syrup. |
Finally (because I'm so daring and darling of course ;) ) I decided to experiment further and wrote J's name in caramel syrup on the batter before I threw it in the oven. This may be a culinary mistake...I'll blame it on love.
So around 30 minutes in the oven they were done!!!
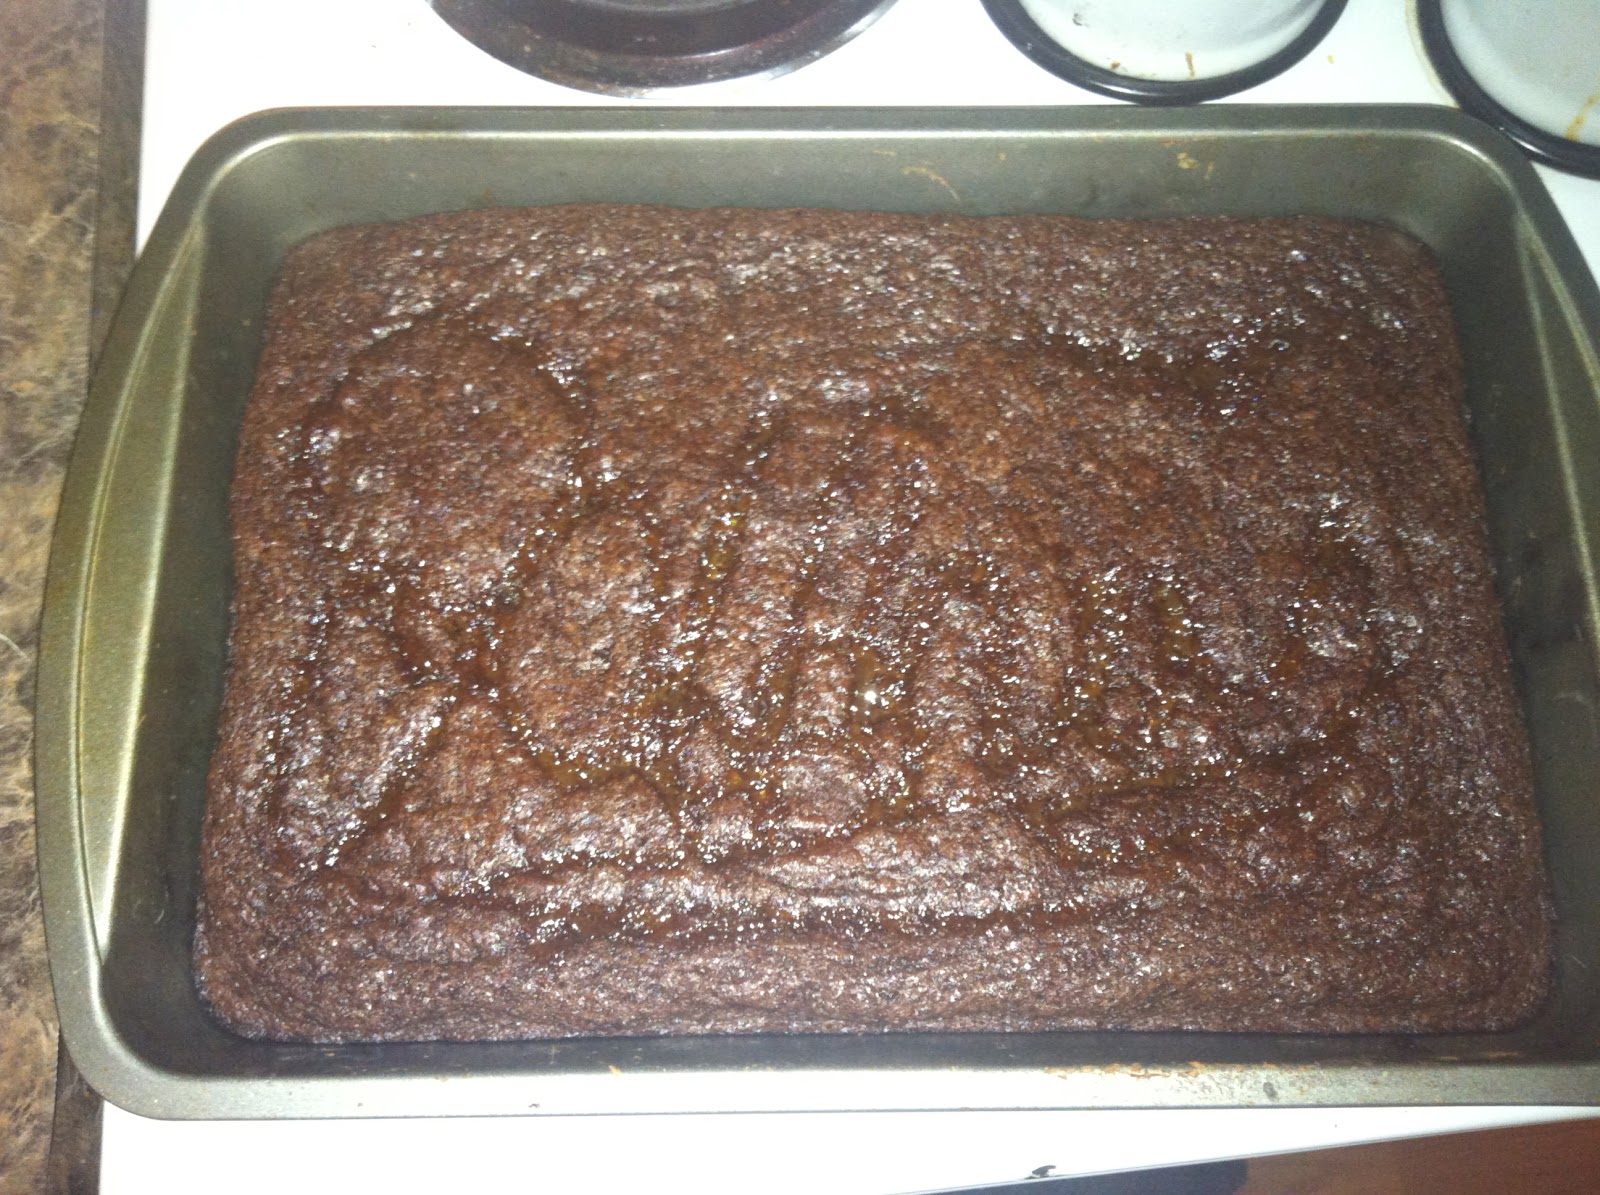 |
| Here's how they look right out of the oven. Someday, they'll invent a way to upload smells so you can understand how strong I am for waiting. ;) |
Update!
They taste really good, but they are very crumbly. The syrup didn't add a lot to the flavor, but I think if I had added more of it would have made more difference and been very nice. Overall I'd say it's a win. :)
Friday, August 24, 2012
A Dark Knight Date
Blogs are such fun! I love reading other women's blogs about how they raise their kids, keep their homes and marriages happy and keep their sanity (or maybe not so much). Yesterday I ran across a this website on Pinterest. It's all about how to continue dating your husband after your life gets crazy!
These "dating divas" are really into themed movie nights. I love this idea. It makes a regular old movie date so much more memorable when you put a little thought and effort into it.
So I skimmed through a few of their themes, ruling out movies we don't own, so it wouldn't cost anything.
Finally, I settled on "The Dark Knight."
This post is where I got my inspiration for our special movie experience. As you can see, I made quite a few changes to their plan to fit our personalities, time and budget.
Here's what you would need to replicate what I did:
A Facebook account and your spouse's "friendship"
(e-mail or another social networking site could also work)
black construction paper
Scissors
White paint, marker or crayon
flashlight
tape
inflatable mattress (cushions or lots of blankets and pillows are fine)
blankets and pillows (bonus points if you have black blankets and pillow cases)
Popcorn
Pickles
(or other snacks)
drinks
Something cute to wear-preferably black
First, I made a Facebook event only he and I could see. It told him the time I thought he'd be home (so he could correct me, if I was mistaken). I added a picture of the movie poster from Google and several trailers from Youtube for him to watch. In the event description, I put a quote from the movie--"It's simple we kill the batman!" This way he know some of what to expect, but he's also curious about what I'm planning. Periodically, through his shift I would add vague updates about what I was doing to spark his curiosity. (You made need to adapt this plan for text messages if your husband doesn't have a computer job, or even plan ahead and make him a paper invite to sneak into his lunch.)
Next, I started decorating. I cut out a bat silhouette from construction paper and painted the words "why so serious?" in white. This was for the front door. Then I cut 2 more, taped one to the porch light so it would be reminiscent of the bat signal and one to the microwave so he would see it when I made the popcorn.


I also made a bat signal of my own out of a flashlight.

The bat signal has a special function for this movie date. When you turn it on, your spouse has to rush over and kiss you. It sounds really silly, but if you both get into it, it's great fun.
I taped the negative cutout from the bat signal to the plastic cover of our lamp. The lamp was too bright, but the room was too dark without it. So I took a black pillowcase and shaded it. This created a really cool ambiance. Especially when combined with the "bat signal" shining on the ceiling.
Then I inflated a camping mattress on the floor, covered it in blankets and pillows and set up the DVD.
When I knew J was almost home, I mixed up some chocolate milk (the drink he requested before he left work) and put his slippers by the door. I wanted him to feel like Bruce Wayne coming into his mansion, not a simple feat when you live in a little duplex.
When he told me I was way cuter than Alfred, I knew it was a success. ;)
These "dating divas" are really into themed movie nights. I love this idea. It makes a regular old movie date so much more memorable when you put a little thought and effort into it.
So I skimmed through a few of their themes, ruling out movies we don't own, so it wouldn't cost anything.
Finally, I settled on "The Dark Knight."
This post is where I got my inspiration for our special movie experience. As you can see, I made quite a few changes to their plan to fit our personalities, time and budget.
Here's what you would need to replicate what I did:
A Facebook account and your spouse's "friendship"
(e-mail or another social networking site could also work)
black construction paper
Scissors
White paint, marker or crayon
flashlight
tape
inflatable mattress (cushions or lots of blankets and pillows are fine)
blankets and pillows (bonus points if you have black blankets and pillow cases)
Popcorn
Pickles
(or other snacks)
drinks
Something cute to wear-preferably black
First, I made a Facebook event only he and I could see. It told him the time I thought he'd be home (so he could correct me, if I was mistaken). I added a picture of the movie poster from Google and several trailers from Youtube for him to watch. In the event description, I put a quote from the movie--"It's simple we kill the batman!" This way he know some of what to expect, but he's also curious about what I'm planning. Periodically, through his shift I would add vague updates about what I was doing to spark his curiosity. (You made need to adapt this plan for text messages if your husband doesn't have a computer job, or even plan ahead and make him a paper invite to sneak into his lunch.)
Next, I started decorating. I cut out a bat silhouette from construction paper and painted the words "why so serious?" in white. This was for the front door. Then I cut 2 more, taped one to the porch light so it would be reminiscent of the bat signal and one to the microwave so he would see it when I made the popcorn.


 |
| I used black construction paper, scissors and pieces of the flashlight. |
 |
| I used the plastic lens cover as a template for a circle that would fit in the light. I cut that shape out. |
 |
| Then I folded the circle in half and cut out the bat shape. I stacked that on top of the plastic lens cover. |
 |
| Then I screwed the case on. |

 |
| Perfect! |
I taped the negative cutout from the bat signal to the plastic cover of our lamp. The lamp was too bright, but the room was too dark without it. So I took a black pillowcase and shaded it. This created a really cool ambiance. Especially when combined with the "bat signal" shining on the ceiling.
 |
| Ignore the "vintage" furniture. ;) |
When I knew J was almost home, I mixed up some chocolate milk (the drink he requested before he left work) and put his slippers by the door. I wanted him to feel like Bruce Wayne coming into his mansion, not a simple feat when you live in a little duplex.
When he told me I was way cuter than Alfred, I knew it was a success. ;)
I'm not endorsing this movie or the sequel. Just fun dates with your spouse. ;)
Friday, June 29, 2012
How I Survive Not Being a Morning Person.
This month I am taking an 8am class, and I don't like it.
So one afternoon, I fired up Mr. Coffee and made a whole pot! I poured some into our 2 ice cube trays, let that freeze a couple of hours in our little freezer, then I put the cubes in a bowl in the freezer and filled the trays again. I repeated this process until I used most of the coffee. Then, when my bowl was full of cubes and I was tired of refilling the trays, I just poured the rest out. It took a while, but if you have a bigger freezer and more trays you could do it all at once.
I am not what you would call a "morning person." I never took an 8am class in my undergrad, because I hate getting up in the morning. I was the girl in high school who always wore her hair in a ponytail, or cut it short so she wouldn't have to fix it in the morning; I only wore makeup if I had a crush on a boy (that's a whole different discussion that we can discuss later), and I would only shower at night. I did all of this so I could sleep until the very last minute, throw on a t-shirt and jeans and go to school.
Never in my life do I remember being a morning person (other than Christmas when I was a kid). This was highly inconvenient at times since I grew up on a farm. Despite my parents best efforts (which once or twice included using ice water), I am, to this day, not a morning person.
You may well wonder why I am taking an 8am class this semester. I wonder too. But at the time of enrollment it seemed like a good idea, so here I am.
This issue is compounded by the fact that J. often works late into the night. I like to wait up for him so we can have time together. But this sometimes limits my sleeping time to 3-5 hours/night. I realize a lot of people sleep 5 hours or less and function well.
I do not.
I get grumpy, sometimes down right mean when I haven't slept enough. I find it hard to control my facial expressions, which have a tendency to express sarcasm.
Do you see how this can be a problem?
So my solution to this problem has come out of desperation.
Coffee!
I know what you're thinking: "DUH!" But let's be honest. When it's already 90 degrees at 7:30 in the morning (Yay Texas!!!) do you really want a hot cup of coffee to start your day off? (My great aunt Shirley would say, 'Yes, and keep a full cup in your hand until you fall asleep at night.') Most normal people would not.
I am not going to pretend like I'm normal, but I would agree with the majority here.
A lot of people get around this by drinking iced coffee, they would purchase some designer frap each morning. But I can't afford this. $5/day on coffee five days a week is about $100/month--that's a huge chunk of change for a pair of newly-weds living on a meager income.
So, you may say make ice coffee at home. That would be cheap! And I agree. I thought about this for a long time. But do you remember how much I hate getting up? What would induce me to get up early enough to make coffee, cool it so it doesn't melt the ice and get watery, ice it and add in the things that make it palatable? (I don't like black coffee, yuck!)
Nothing is worth getting up that early and working that hard first thing in the morning.
Also, we have an old school 12 cup coffee maker, no cute little espresso machine that makes a cup at a time. For some reason, I never can get the right ratio of coffee grounds and water to make good coffee for one.
So I had to figure out a way around this.
I was perusing Pinterest in a sleepy haze a couple of weeks ago when I ran across one of those funny e-cards. It said something about freezing leftover wine in ice cube trays. The joke was that the person didn't know what leftover wine was. While I'm not the type of girl to guzzle a bottle of Merlot in one sitting, this e-card gave me inspiration.
I could freeze coffee in ice cube trays and make frozen coffee drinks quickly.
 |
| They even look cool! |
Now in the mornings when I need a little pick me up, I take a blender cup and put the cubes in it like if I were going to pour some iced tea. Then I pour milk over them. (Calcium anyone?) I add a little sugar, and sometimes I add in a little vanilla extract. (I'm thinking about trying chocolate syrup on Monday.) Then I just blend it until the coffee cubes are broken down.
It tastes great and only takes about a minute--start to finish.
It's also cost effective. None of the ingredients are expensive at all unless you want to buy expensive coffee. Even that is exponentially less than buying a drink from a coffee shop each morning. It also takes less time than you would spend waiting in line at one of those places.
Other perks include, we never throw out expired milk anymore; I'm getting more calcium, which almost all women need; and I'm a happier person in class every morning.
I don't drink coffee every day, because I don't want to become dependent. But on those morning where I feel like any little thing may set me off, it certainly helps to have something sweet and energizing to start the morning.
I hope this helps some kindred spirit out there who also hates the morning. If you have other suggestions for me, please comment. I'm all ears! (...unless it's 8am.)
Monday, June 4, 2012
Boston Cream Pie Cupcakes recipe in review
Today I attempted a new recipe. I generally like inventing my own recipes, but this one incorporated one of J's favorite desserts into a cupcake. Whats not to love?
Here's the recipe I used:
Boston Cream Pie Cupcakes Recipe:
(Recipe from Heck Fridays)
24 cake-mix yellow cupcakes, cooled and unwrapped (I used a butter golden mix)
1 (3.4 oz) box French Vanilla instant pudding
1 1/2 cups heavy whipping cream
1/2 cup powdered sugar
1/4 cup milk
1/2 cup sour cream
Make cupcakes according to directions on box.
Mix together pudding, cream, powdered sugar, milk, and sour cream. Beat on medium speed until stuff peaks form. Cut each cupcake in half and add a dollop of filling. Put top back on cupcake and frost with ganache.
Ganache:
1 cup heavy whipping cream
12 oz semi-sweet chocolate chips
Heat cream in sauce pan until it comes to a boil. Remove from heat, pour over chocolate in a mixing bowl. Stir to mix together. Let cool slightly.
Keep in refrigerator until ready to serve.
So I followed these directions, and let me tell you, these cupcakes are a delicious and delightful mess!
Here are a couple of mistakes I think I made along the way that may make yours come out better.
First, I shorted the butter a little in the cupcakes. I was about a tablespoon short and didn't have any more, so I just went with it. I think this is what made the cupcakes a little flimsy and harder to deal with. Also they were a little flat on top.
Second, I took the word "stiff" a little too literally. My filling didn't really form "dollops" in the traditional sense. They were more like spikey blobs from a bad science fiction movie. Doing it again, I might whip a little less.
Third, I made too much frosting. I would say you really only need about half of what the recipe calls for. But, I LOVE chocolate, so I went ahead and used it all. The result is some drippy, messy cupcakes.
While forks will be a must for these messy treasures, there are a few points of this recipe that I think are delightful.
This filling is delicious! I had a little leftover after I finished putting the cupcakes together. I will confess that I ate it. (Shhhh don't tell on me!) Delicious is not the right word; I think I may dream about it tonight.
In fact, it was so delightful that it has inspired me to attempt a new recipe later after these are gone.
I recently pinned a recipe for "Hocus Pocus Buns" that are supposed to yield hollow cinnamon-sugar pastries. I want to fill them with the Boston Cream filling (maybe dip them in chocolate) and freeze them like eclairs. Do you think this will work?
Here's the recipe I used:
Boston Cream Pie Cupcakes Recipe:
(Recipe from Heck Fridays)
24 cake-mix yellow cupcakes, cooled and unwrapped (I used a butter golden mix)
1 (3.4 oz) box French Vanilla instant pudding
1 1/2 cups heavy whipping cream
1/2 cup powdered sugar
1/4 cup milk
1/2 cup sour cream
Make cupcakes according to directions on box.
Mix together pudding, cream, powdered sugar, milk, and sour cream. Beat on medium speed until stuff peaks form. Cut each cupcake in half and add a dollop of filling. Put top back on cupcake and frost with ganache.
Ganache:
1 cup heavy whipping cream
12 oz semi-sweet chocolate chips
Heat cream in sauce pan until it comes to a boil. Remove from heat, pour over chocolate in a mixing bowl. Stir to mix together. Let cool slightly.
Keep in refrigerator until ready to serve.
So I followed these directions, and let me tell you, these cupcakes are a delicious and delightful mess!
 |
| One of the less messy ones... |
Here are a couple of mistakes I think I made along the way that may make yours come out better.
First, I shorted the butter a little in the cupcakes. I was about a tablespoon short and didn't have any more, so I just went with it. I think this is what made the cupcakes a little flimsy and harder to deal with. Also they were a little flat on top.
Second, I took the word "stiff" a little too literally. My filling didn't really form "dollops" in the traditional sense. They were more like spikey blobs from a bad science fiction movie. Doing it again, I might whip a little less.
Third, I made too much frosting. I would say you really only need about half of what the recipe calls for. But, I LOVE chocolate, so I went ahead and used it all. The result is some drippy, messy cupcakes.
While forks will be a must for these messy treasures, there are a few points of this recipe that I think are delightful.
This filling is delicious! I had a little leftover after I finished putting the cupcakes together. I will confess that I ate it. (Shhhh don't tell on me!) Delicious is not the right word; I think I may dream about it tonight.
In fact, it was so delightful that it has inspired me to attempt a new recipe later after these are gone.
I recently pinned a recipe for "Hocus Pocus Buns" that are supposed to yield hollow cinnamon-sugar pastries. I want to fill them with the Boston Cream filling (maybe dip them in chocolate) and freeze them like eclairs. Do you think this will work?
Friday, May 25, 2012
Infant Kilt
Some good friends of mine are going to have a baby in September, and I wanted to give them something personal for the baby. So I decided to make a kilt for their baby. I didn't have a pattern or any real direction so it was all very trial error. Here I'll share with you how I did it and what I learned.
I'm honestly not a great seamstress. It's something I dabble in, but I'm not enough of a perfectionist to be really good at it. With that said, you real seamstresses out there, may be appalled by my primitive techniques.
The first thing I had to do was choose a fabric. I found a great plaid with lots of primary colors at Joann. It also happened to be very similar to the plaid the grandma-to-be suggested when we first started talking about me doing this.
The fabric was just a simple cotton. I bought half a yard and roll of 3/4" elastic. I had white thread at home that I thought would look nice, so I didn't bother with any other stuff.
If I were to do this again I would have also purchased 1/2"-3/4" Velcro as well.
I came home at a bit of a loss for how to get started.
I knew I didn't want to hem the bottom after I put in pleats. So, counter-intuitively, I started with hem. I folded the fabric twice, ironed it flat and hemmed the whole length. (I'm sure there's some great technical term for folding twice, but I've never been much for technical terms.)
It took me a while to determine how long the kilt should be, but I settled on cutting it about 9 inches from the hem. I did this based on a baby skirt pattern I found online. I don't know how this length will work on the actual baby, but I have a feeling it may be too long.
Then I started making pleats because I knew I wanted all the seams on the top of the kilt to be on top of the pleats.
I got my iron out for this part too obviously.
It took me a while to figure out the easiest way to make this many pleats, but I discovered that I needed to stack them on top of one another rather than fold them under each other. I made the pleats an inch apart and folded about 1/4" under. I ironed and pinned each of them on the waist and hem. I left about 6" on the end for the front panel.
At this point I went ahead sewed across the waist to secure the pleats, took out my pins. I realize now that I probably should have left the bottom pins in so the pleats would stay sharp.
Then I set that part aside. I decided I wanted to make a separate waistband with elastic rather than adding elastic to the pleated part of the kilt.
So, I made a waistband and attached it to the base of the kilt. I did this by cutting a strip that was 2" wide. (I would do 2 1/2" if I did this again. Then I sewed the edges right side together so it was inside out. I turned it right side out with a pen (a nifty trick I learned in 4-H as a kid), and put the elastic in.
I've never really learned how to work with elastic, so this part didn't come out quite how I envisioned it. If you are ignorant like me, you might seek out some help or internet tutorials on this.
 |
| Front |
I attached the waistband to the top of the kilt with a very small seam allowance. I didn't hem the top first or anything so there's a raw edge there. If I were to redo this part I might try a french seam there (thus the added width mentioned above), or just hem the top edge first.
I did not attach the flat front panel to the waistband. I did a very small hem on the top of it and left it out.
At this point, my sewing machine stopped working, so I hand basted the corner of the front flap to the bottom of the waistband.
 |
| Back |
If I were to do this again, I would have done this last part very differently.
I would have used elastic in the entire top of the project and not closed it around the waist. Instead, for closure I would have installed Velcro on the front panel and front of the waist. This would make the kilt more adjustable and comfortable to fit the baby.
That's how I would recommend someone wanting to try this do it.
With all the trial and error, the finished product is pretty cute if I do say so myself.
Monday, May 7, 2012
box of paper
So our anniversary came and went yesterday. It was such fun, and I'm so excited because I can finally share what I did.
I gave my husband a box of paper.
I thought and thought about what to get J, and hated every idea I came across.
I knew I wanted to make whatever I gave him myself, so I decided to just go to the craft store and try to get inspiration that way.
I was there for a long time. It seemed like hours but it may not have been. Then finally the idea donned on me.
EUREKA!
I purchased the following supplies:
1 unfinished wooden box with lid with a picture frame on top
2 tubes of paint, one white, one black
1 unfinished wooden heart
2 black wooden letters one J. for his name and one S. for my name
2 white wooden cutouts one of the word Imagine and one of the word dream.
1 paintbrush
I came home that day full of ideas and motivation and went right to work. First, I gathered the supplies I needed that I had around the house.
1 leftover engagement picture of us in black and white
 1 bottle of glue
scissors
Then I painted the base of the box white and the lid black and allowed those to dry. Once they were dry I diluted the paint a little and brushed white over the black and black over the white. I did the heart cutout this way as well, white first then black.
Finally, all of that was dry and I was able to glue on the wood pieces. I used a generous amount of Elmer's glue and they held very nicely. I cut our picture down to fit the frame in the lid and viola, my box was done.
Then I got on the phone. I called members of J's family, his friends, and some of my family he's close to. I asked each of them to write him a letter and mail it to me. I asked them to encourage him, tell him what they like about him and just be positive in general.
As the letters arrived I put them in the box, which I kept hidden.
I also wrote 2 letters myself. I attached one to the inside of the lid. It explained what the box was for and why I made it. The second was my letter of encouragement and praise for him and I nestled it in with the rest.
Another thing I put in the box was a Pez dispenser of his favorite childhood cartoon character and extra Pez. (He loves Pez.)
Finally, because someone had suggested origami and another suggested a kite (neither idea seemed the perfect fit for this year), I made an origami kite. (Well, I tried to. It came out pretty sad.) This kite had another silly little note on the inside.
So when the evening came I presented first the kite, then the box. He had a great time going through the letters.
And there's enough room still in it for him to use the box for other correspondence, or inspirations that come to him.
So all told, the box of paper was a success.
I gave my husband a box of paper.
I thought and thought about what to get J, and hated every idea I came across.
I knew I wanted to make whatever I gave him myself, so I decided to just go to the craft store and try to get inspiration that way.
I was there for a long time. It seemed like hours but it may not have been. Then finally the idea donned on me.
EUREKA!
I purchased the following supplies:
1 unfinished wooden box with lid with a picture frame on top
2 tubes of paint, one white, one black
1 unfinished wooden heart
2 black wooden letters one J. for his name and one S. for my name
2 white wooden cutouts one of the word Imagine and one of the word dream.
1 paintbrush
I came home that day full of ideas and motivation and went right to work. First, I gathered the supplies I needed that I had around the house.
1 leftover engagement picture of us in black and white
 1 bottle of glue
scissors
Then I painted the base of the box white and the lid black and allowed those to dry. Once they were dry I diluted the paint a little and brushed white over the black and black over the white. I did the heart cutout this way as well, white first then black.
Finally, all of that was dry and I was able to glue on the wood pieces. I used a generous amount of Elmer's glue and they held very nicely. I cut our picture down to fit the frame in the lid and viola, my box was done.
Then I got on the phone. I called members of J's family, his friends, and some of my family he's close to. I asked each of them to write him a letter and mail it to me. I asked them to encourage him, tell him what they like about him and just be positive in general.
As the letters arrived I put them in the box, which I kept hidden.
I also wrote 2 letters myself. I attached one to the inside of the lid. It explained what the box was for and why I made it. The second was my letter of encouragement and praise for him and I nestled it in with the rest.
Another thing I put in the box was a Pez dispenser of his favorite childhood cartoon character and extra Pez. (He loves Pez.)
Finally, because someone had suggested origami and another suggested a kite (neither idea seemed the perfect fit for this year), I made an origami kite. (Well, I tried to. It came out pretty sad.) This kite had another silly little note on the inside.
So when the evening came I presented first the kite, then the box. He had a great time going through the letters.
And there's enough room still in it for him to use the box for other correspondence, or inspirations that come to him.
So all told, the box of paper was a success.
Monday, April 23, 2012
Homemade Date Night!
Last night J sent me a message saying he wanted to do something fun tonight. So we tossed around a few ideas.
First, we thought about doing a movie marathon, but neither of us were too excited about that this time. So we elected to do that on another day maybe this summer.
Next, we thought about renting a video game we both have been wanting to play, Harry Potter Lego 5-7. (Yes we are uber-nerds!) But I was craving something that would allow us to talk more, so we set that aside for another day.
At this point in our conversation, I start googling for ideas. Since I kinda shot down one that he was so excited about I wanted to come up with something he could get equally excited about that would give me the interaction I was looking for too.
Several sites I visited mentioned twister. Light bulb! I told Scott I thought we should go out and buy it, but he had a better idea, make it!
All we did was cut construction paper into circles. There were six of each color, blue, yellow, green and red (we didn't have red so we used pink) and laid them out on the floor in a grid. Viola, instant twister! Yes, they did slip and slide on the carpet but that made it exponentially more fun and challenging. We took turns calling out colors for the other person. It didn't take long for us to discover that neither of us are very good at it, but we had a blast. I can't wait to play again.
Our plan was to also make brownies. Since I bought a mix last time I got groceries we didn't have to leave the house for that either. We found that brownie breaks were necessary throughout our twister game, and there was no guilt because we were burning all the calories we were eating (well some of them anyway).
Finally, I saw on Pinterest.com someone suggested making a blanket fort. This was one of my favorite things to do as a kid so why not relive that with my husband? But by the time we were done playing twister we were not up crawling around on the floor anymore, so I'll put that one on the 'For Later' list too.
Here's a sampling of other date ideas on the For Later list:
First, we thought about doing a movie marathon, but neither of us were too excited about that this time. So we elected to do that on another day maybe this summer.
Next, we thought about renting a video game we both have been wanting to play, Harry Potter Lego 5-7. (Yes we are uber-nerds!) But I was craving something that would allow us to talk more, so we set that aside for another day.
At this point in our conversation, I start googling for ideas. Since I kinda shot down one that he was so excited about I wanted to come up with something he could get equally excited about that would give me the interaction I was looking for too.
Several sites I visited mentioned twister. Light bulb! I told Scott I thought we should go out and buy it, but he had a better idea, make it!
All we did was cut construction paper into circles. There were six of each color, blue, yellow, green and red (we didn't have red so we used pink) and laid them out on the floor in a grid. Viola, instant twister! Yes, they did slip and slide on the carpet but that made it exponentially more fun and challenging. We took turns calling out colors for the other person. It didn't take long for us to discover that neither of us are very good at it, but we had a blast. I can't wait to play again.
Our plan was to also make brownies. Since I bought a mix last time I got groceries we didn't have to leave the house for that either. We found that brownie breaks were necessary throughout our twister game, and there was no guilt because we were burning all the calories we were eating (well some of them anyway).
Finally, I saw on Pinterest.com someone suggested making a blanket fort. This was one of my favorite things to do as a kid so why not relive that with my husband? But by the time we were done playing twister we were not up crawling around on the floor anymore, so I'll put that one on the 'For Later' list too.
Here's a sampling of other date ideas on the For Later list:
- Draw portraits (in our case more like caricatures) of each other.
- Paint something abstract on canvas together.
- Fly kites in the park
- Cook dinner together--make something we have never made before
- Star gazing in the country
- Go camping
- Try "Painting with a Twist," a Lubbock art studio with amateur classes
- Ice or roller skating
- Six Flags
Maybe some of our ideas will inspire you for a fun date with your significant other. Have fun!!!
Subscribe to:
Posts (Atom)